Every car enthusiast eventually faces a project that tests their limits and resourcefulness in the garage. One such job is removing a transmission without a lift. Although professional mechanics rely on hydraulic lifts to hoist vehicles high into the air, home mechanics often must make do with jack stands and sheer determination.
Fortunately, you can tackle this endeavor on your driveway floor with the right preparation and safety measures. Read on for a helpful guide that covers the essential steps you need to follow.
Prioritize Safety and Preparation
Safety remains paramount when you plan to work underneath a heavy vehicle supported only by mechanical stands. Ensure you park the car on a flat concrete surface because asphalt can soften in the heat and cause the stands to sink or tip.
Chock the wheels that will remain on the ground securely to prevent any accidental rolling while you wrench on tight bolts. Gather all the tools you might need, including a high-quality floor jack, four sturdy jack stands, a transmission jack adapter, and a comprehensive set of impact sockets.
You should also disconnect the battery’s negative terminal to prevent electrical shorts and potential fires while you disconnect starter wires and sensors. Taking these precautions creates a secure environment where you can focus entirely on the complex mechanical task ahead.
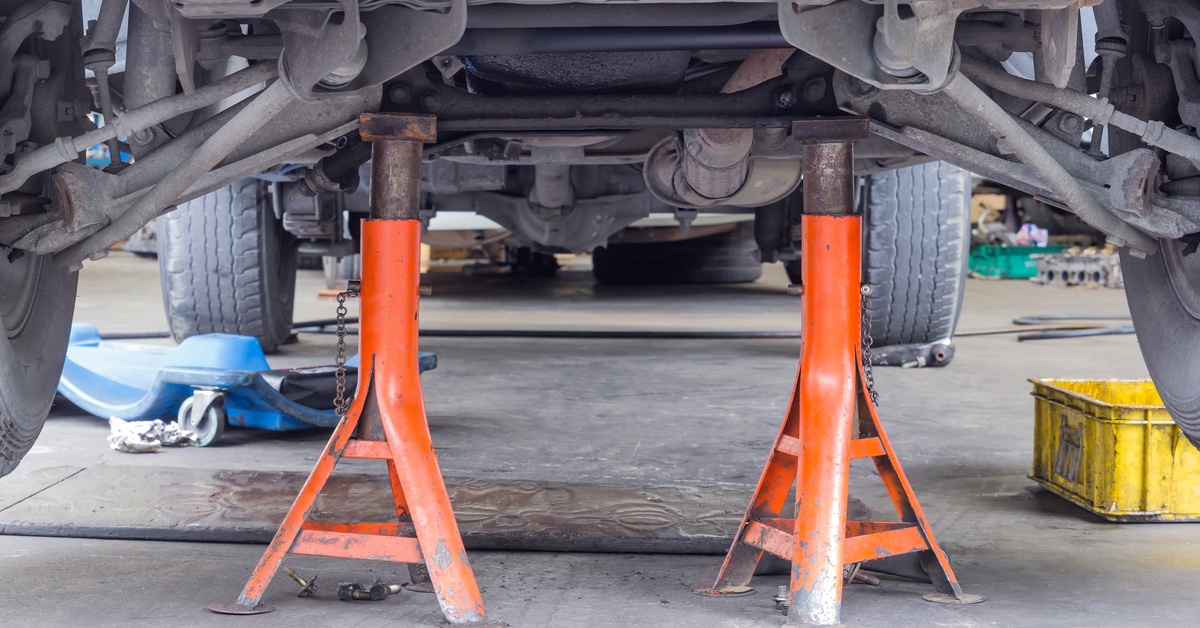
Raise the Vehicle for Maximum Clearance
Another important tip for removing a transmission without a lift is to use every inch of vertical space available to maneuver it out. Start by lifting the front of the vehicle as high as your jack allows, then place your stands at the manufacturer's recommended lift points.
Repeat this process for the rear of the vehicle to ensure the car sits level, which makes fluid draining and transmission removal significantly easier. Verify the car’s stability by giving it a firm shake before you slide underneath it.
Drain Your Transmission Fluid
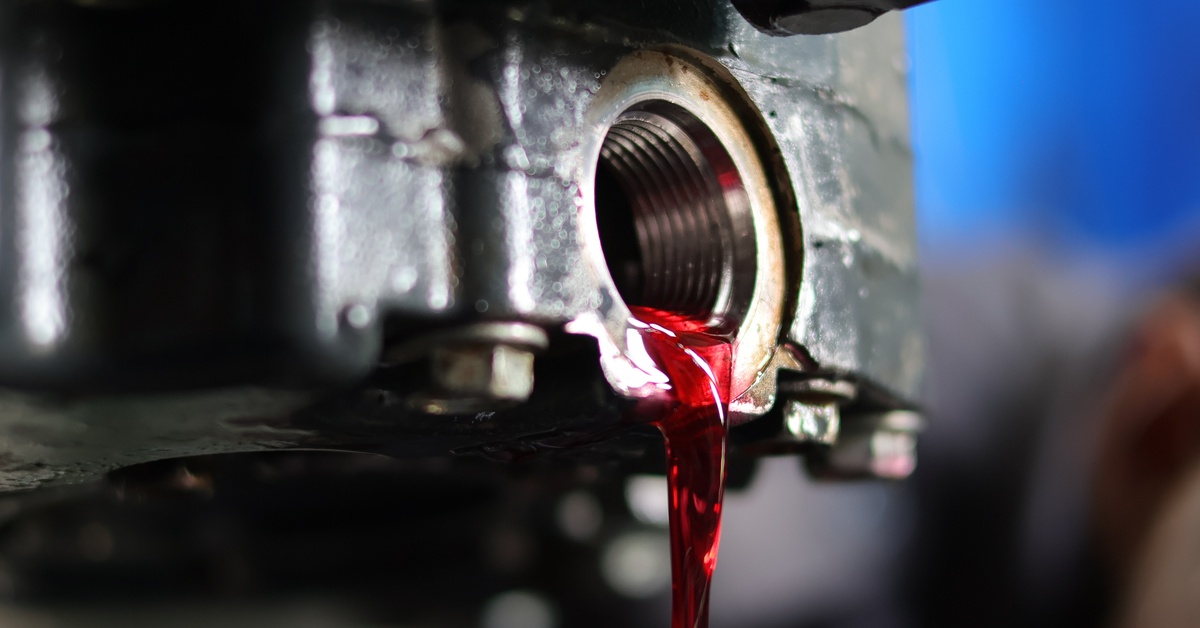
Attempting to wrestle a heavy transmission while it sloshes full of fluid invites a messy disaster on your garage floor. Locate the drain plug on the transmission pan and empty the fluid into a suitable catch container before you start unbolting major components.
If your transmission lacks a drain plug, you will need to carefully loosen the pan bolts to let the fluid seep out slowly from one corner. Once the fluid drains, remove the dipstick tube and any other accessories that clutter the workspace around the bell housing.
Disconnect the Driveshaft and Axles
The driveshaft or CV axles physically connect your transmission to the wheels and must come out before the gearbox can move. For rear-wheel-drive cars, unbolt the driveshaft from the differential first, then carefully slide the yoke out of the transmission tail housing. You should wrap the tail housing in a plastic bag or rag to catch the residual fluid that inevitably drips out when you remove the yoke.
On front-wheel-drive vehicles, you typically need to pop the ball joints loose to swing the steering knuckles out and release the CV axles from the transaxle. Inspect the seals while you have everything apart, as this presents the perfect opportunity to replace worn components. Careful handling of the driveshaft prevents damage to the delicate U-joints or carrier bearings.
Unplug Sensors and Linkages
Modern transmissions rely on a complex web of electronic sensors and mechanical linkages to function correctly. You must meticulously locate and disconnect every electrical connector attached to the transmission body, including the speed sensor, neutral safety switch, and solenoid pack connectors.
Labeling each connector with masking tape helps ensure you plug everything back into the correct spot during reassembly. Disconnect the shift linkage or cable that connects the gear selector inside the cabin to the transmission lever. Missing a single ground strap or wire-harness clip can cause wires to tear when you lower the transmission.
Support the Engine and Transmission
Gravity becomes your enemy once you remove the structural components holding the drivetrain in place. You must support the engine’s back because removing the transmission mounts can cause it to tilt backward dangerously. Place a block of wood on your floor jack and position it gently under the engine oil pan to support the weight without denting the oil pan.
Position your transmission jack or a floor jack with a transmission adapter directly under the transmission fluid pan. Secure the transmission to the jack using ratchet straps or chains to prevent it from slipping off as you wiggle it free. This balancing act ensures that neither the engine nor the transmission crashes down when you remove the final mounting bolts.
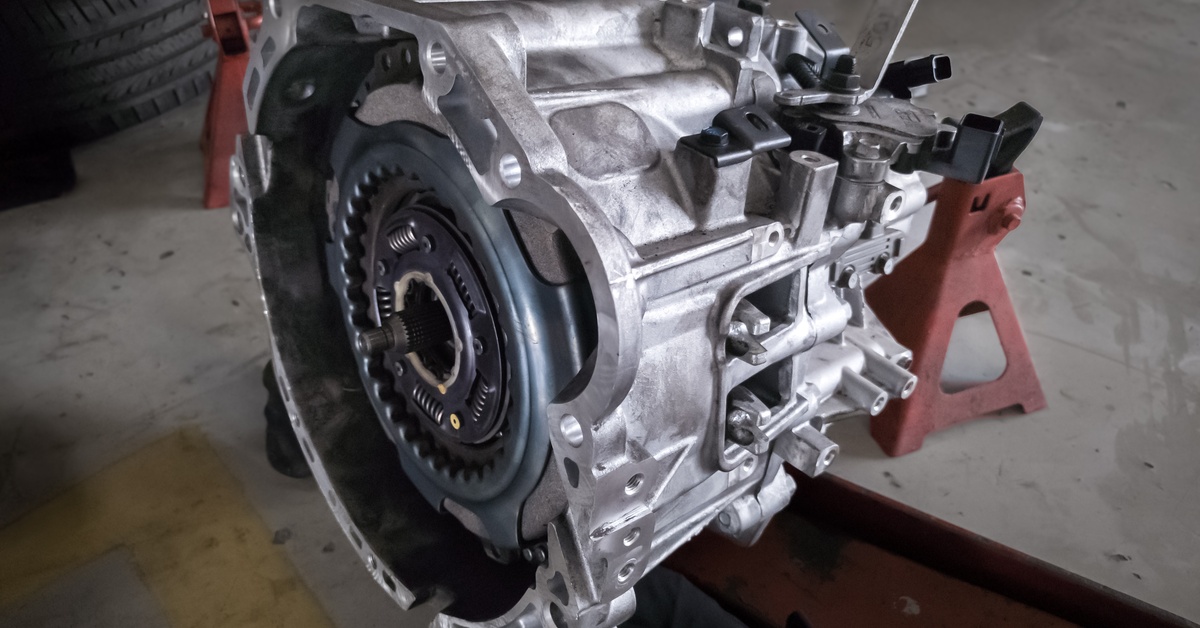
Unbolt the Bell Housing and Torque Converter
The moment of truth arrives when you begin removing the bolts that marry the transmission to the engine block. You will likely need long extensions and swivel sockets to reach the upper bell housing bolts that sit high up in the transmission tunnel. On automatic transmissions, you must remove the inspection cover to access the bolts connecting the torque converter to the flexplate.
Rotate the engine by hand using a socket on the crank pulley to access and remove each torque converter bolt individually. Once you remove all bell housing bolts, the transmission should be held up solely by the jack and the dowel pins. Double-check that you removed every bolt before attempting to pry the transmission away from the engine.
Separate and Lower the Transmission
You need patience and finesse to separate the transmission from the engine without damaging the input shaft or the clutch assembly. Wiggle the transmission gently from side to side to break the bond created by the dowel pins and corrosion. Pull the transmission straight back away from the engine until the input shaft completely clears the clutch pressure plate or the torque converter clears the flexplate.
You must keep the transmission level during this process to avoid binding the input shaft in the pilot bearing. Once you confirm complete separation, slowly lower the jack while a helper watches for any snagged wires or hoses. Lower the unit to the ground and carefully slide it out from under the vehicle.
Successfully removing a vehicle's transmission without professional shop equipment stands as a testament to a mechanic's skill and perseverance. This challenging process requires you to understand the intricate connections between your vehicle's drivetrain components while managing heavy weights in confined spaces. Mastering this task also saves you significant money on labor costs and deepens your understanding of how your vehicle transfers power to the road.
If you need parts to repair or rebuild your transmission before returning it to your vehicle, contact Transparts Warehouse today. For example, our offerings include transfer case parts that will get your drivetrain running smoothly again.


